I installed the app, what's the next step? Guide on how to configure the Dr Free Gift, BOGO Buy X Get Y Shopify App
APP SETUP
CREATE FREE GIFTS
HOW TO'S
PROMOTE YOUR FREE GIFT
GIFT INVENTORY
GIFT FRAUD
FAQS
TROUBLESHOOTING
What You Will Learn in This Article:
Introduction
Thank you for choosing our app Dr. Free Gift! We’re excited to help you get started with rewarding your customers with gifts for spending more. Offering gifts is a great way to boost conversion rates, and our app provides both a simple setup for beginners and a robust set of features for creating more advanced incentive programs. Let’s get started!
Step 1: Enable the App Embed Loading Method
To ensure optimal load times for the app, begin by navigating to the Settings page. From there, enable the “App Embed” loading method. This step is essential for a smooth and efficient app performance, allowing it to integrate seamlessly with your store.
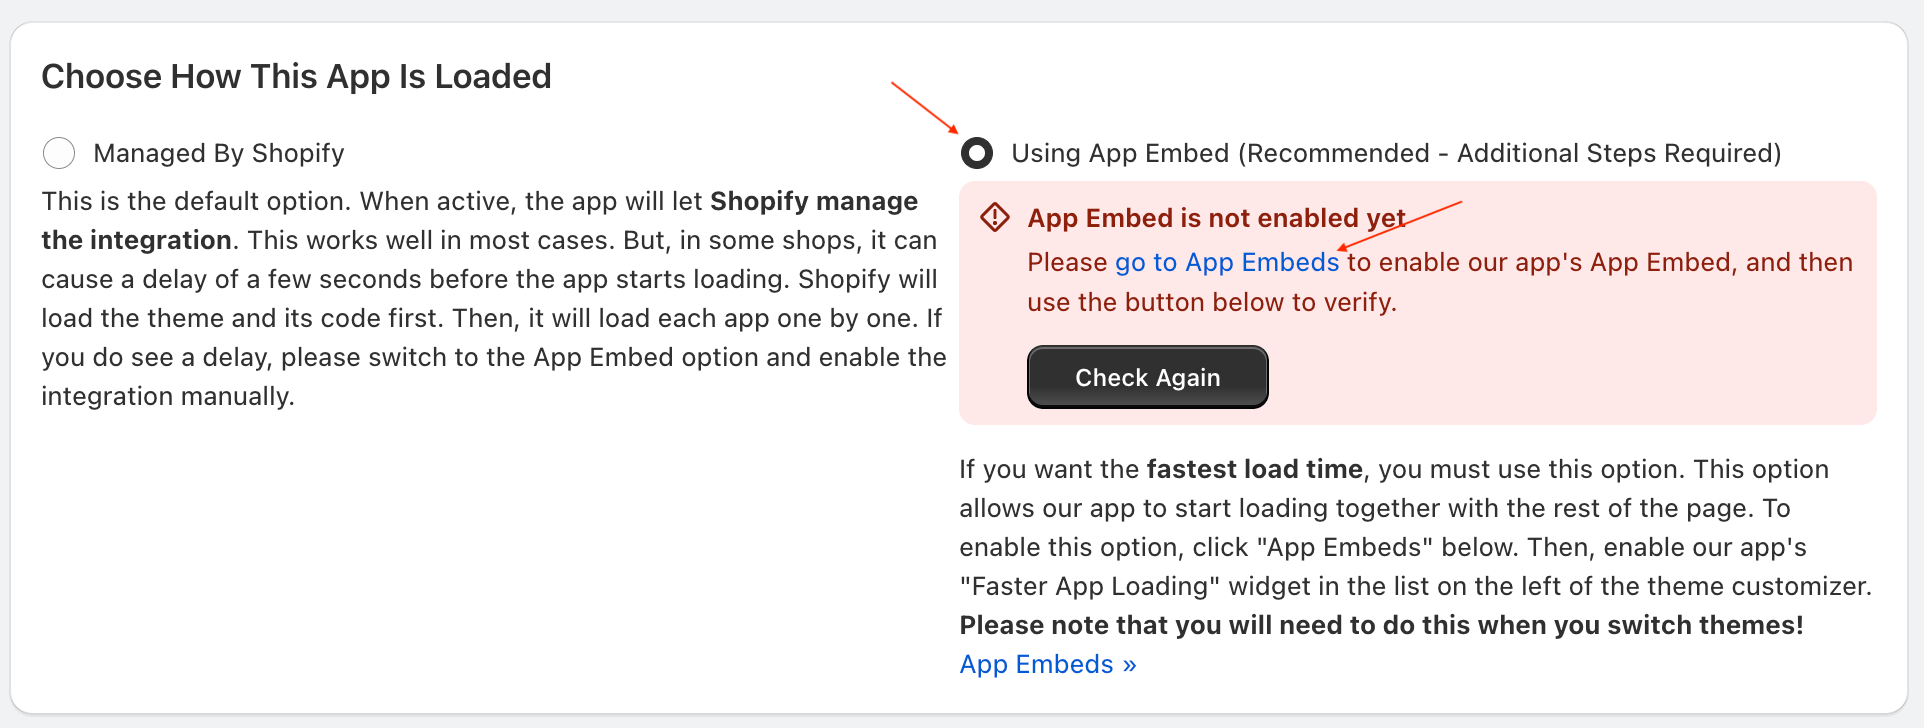
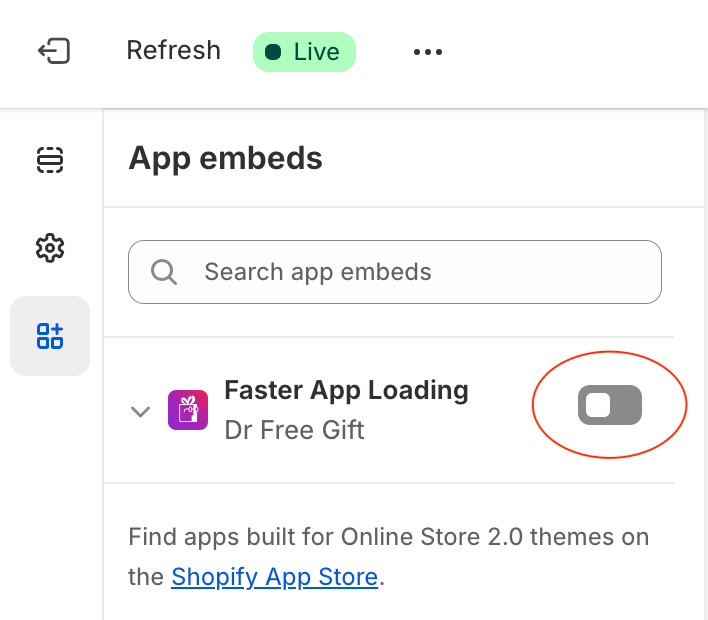
To complete the activation process, click the provided link to open App Embeds in the Shopify Theme Customizer. There, you’ll find the app’s App Embed section, where you can enable it with a single click.
Step 2: Create a Gift
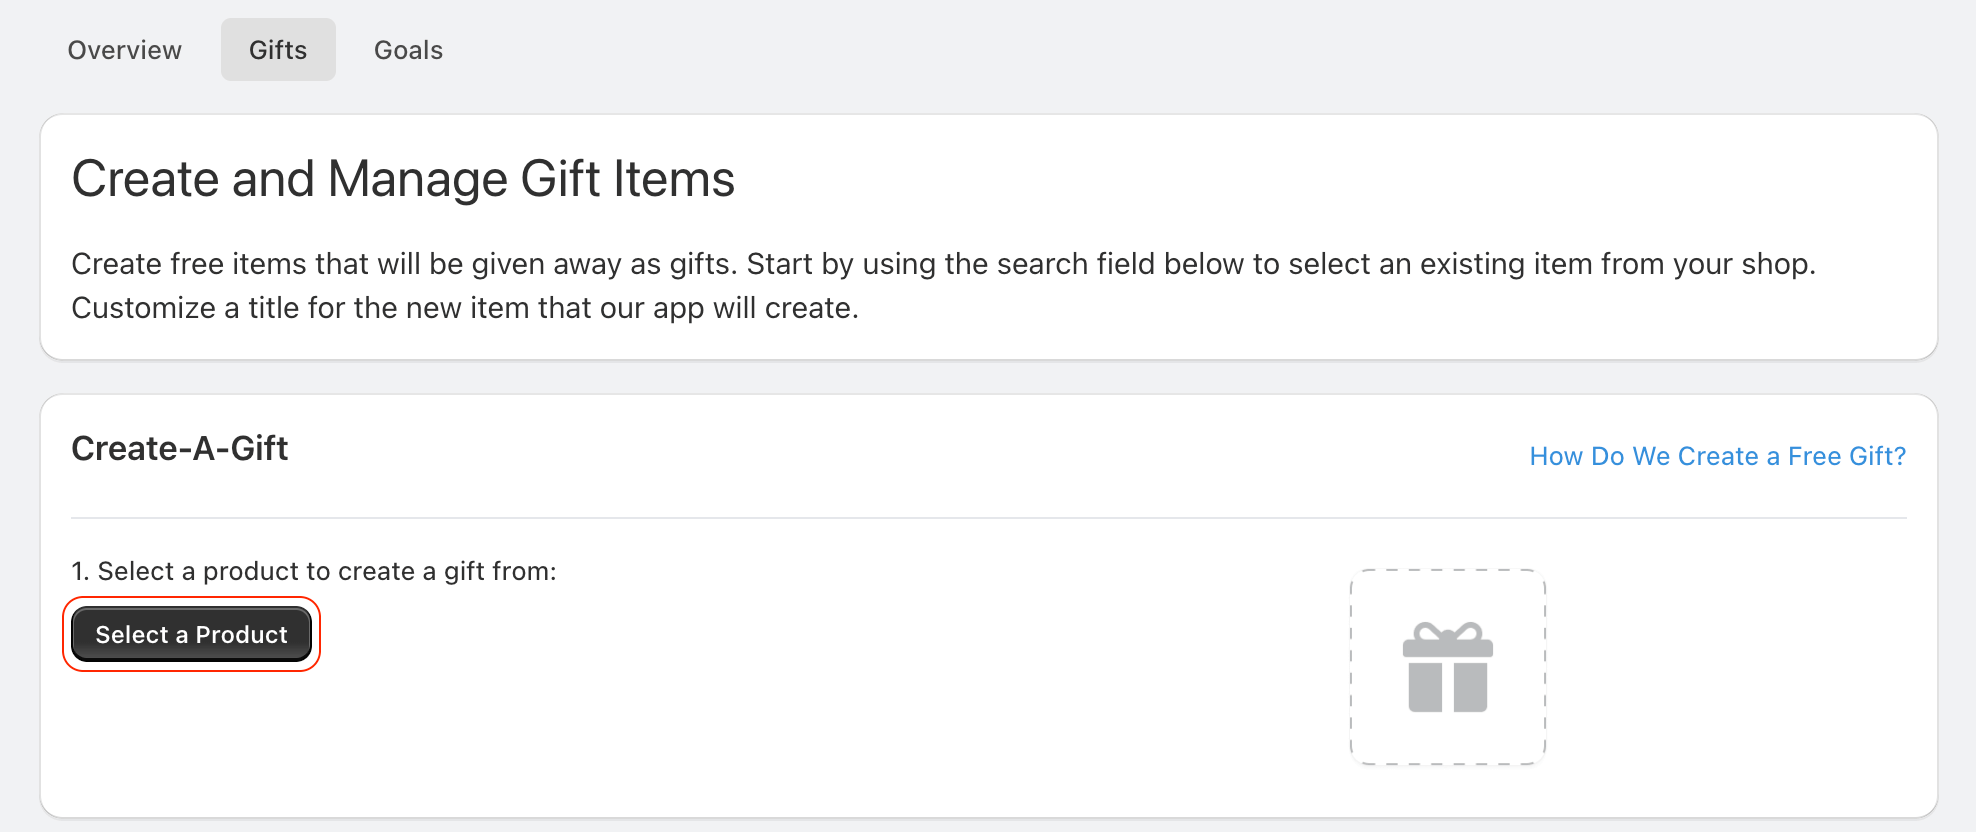
Navigate to the Gifts and Goals page and click Configure under the Manage Free Gifts section. Once on the configuration page, click Select a Product to start setting up your gift.
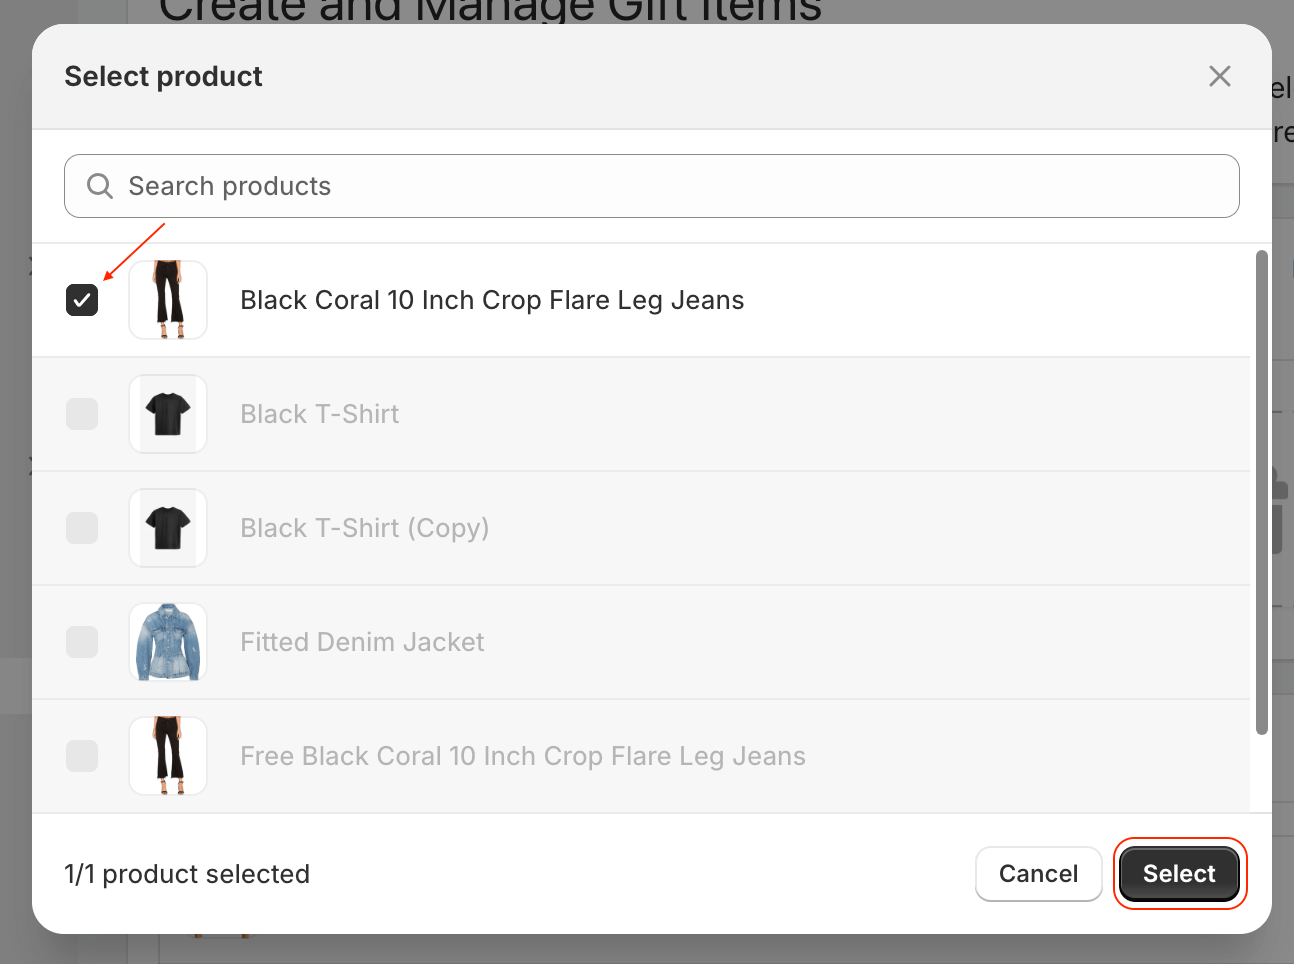
After clicking Select a Product, choose the product you want the app to copy to create your free gift. Once selected, click Select to confirm your choice.
At this stage, you can customize the title of your gift to make it more appealing or descriptive. Once you’re satisfied, click Create Free Gift.
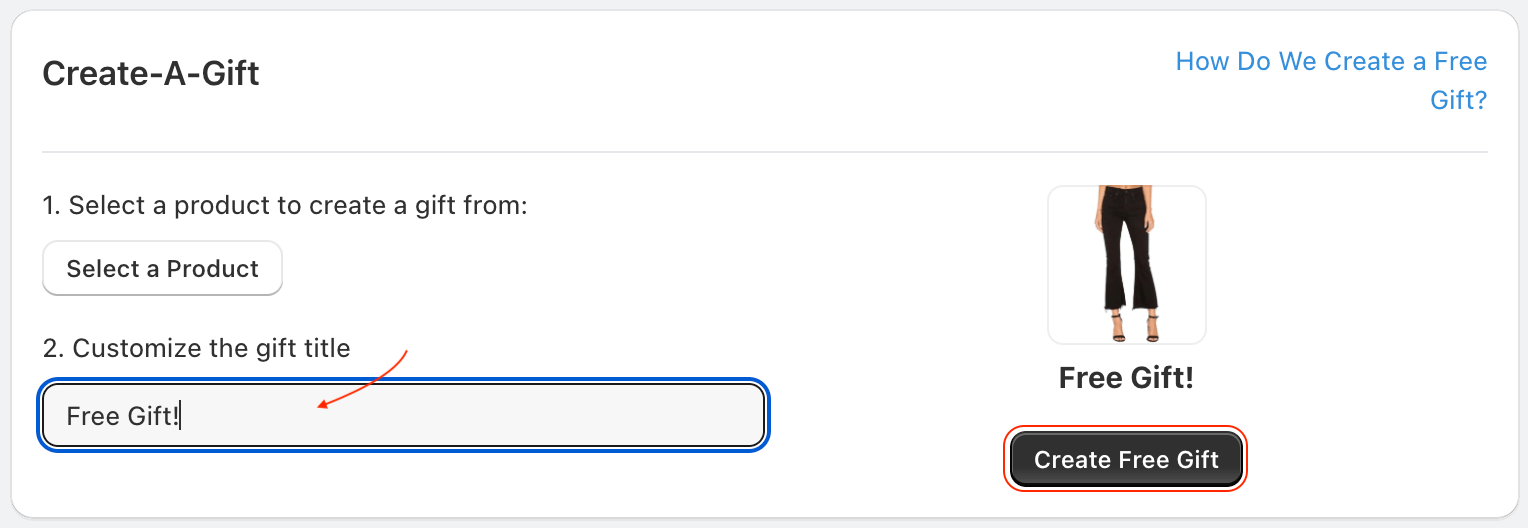
It may take a few minutes for Shopify to complete the gift creation process, depending on the number of variants in the original product. Once the gift is created, you can modify it in the Shopify Products admin just like any other product.
Important Notes:
Gift Price Changes:
- Changing a gift’s price from zero to any other amount will cause the app to disable any active goals associated with the gift.
- This safety measure prevents customers from being locked into purchasing an additional product they cannot remove from their cart.
- After adjusting the price, you’ll need to manually re-activate the goals to use them again.
Using the “Compare at” Price:
- Updating the Compare at price allows you to highlight the value customers are saving by receiving the gift.
- Whether this price is displayed on the cart page or drawer cart depends on your theme. You may need assistance from your theme developer to ensure it’s visible.
Step 3: Create a Gift Goal
Once your gift is created, switch to the Goals tab on the Gifts and Goals page. To begin, click the New Goal button in the Free Gift Goals section. You can also create free shipping goals and discount goals on this page.
Step 1: Set a Goal Name
Start by giving your goal a name that clearly communicates what the customer will receive when they meet the goal. This name will be displayed in the app’s promotional widgets, such as the Progress Bar, Gift Goal Modal, and Slider, ensuring customers understand their reward.

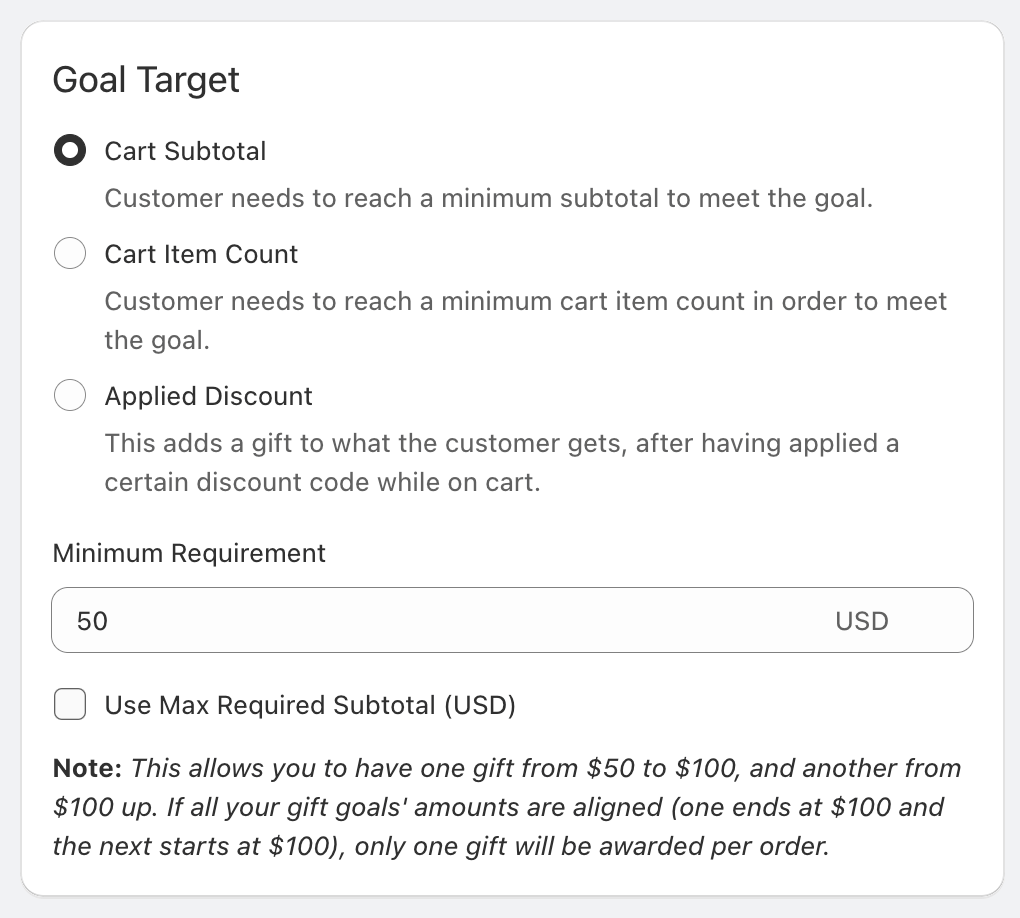
Step 2: Configure the Goal’s Target
Set the target for your goal by choosing one of the following prerequisites:
- Subtotal: Award a gift based on the cart’s minimum subtotal.
- Item Count: Trigger the gift when the cart contains a minimum number of items.
- Discount Applied: Use the presence of a specific discount applied to the cart as the condition.
You can also define a maximum subtotal or item count, which is helpful for creating tiered goals. For example, you can set up:
- A smaller gift for carts below the maximum threshold.
- A larger gift for carts exceeding the threshold, automatically removing the smaller gift from the cart.
This allows you to tailor rewards based on spending or cart size while keeping the process seamless for customers.
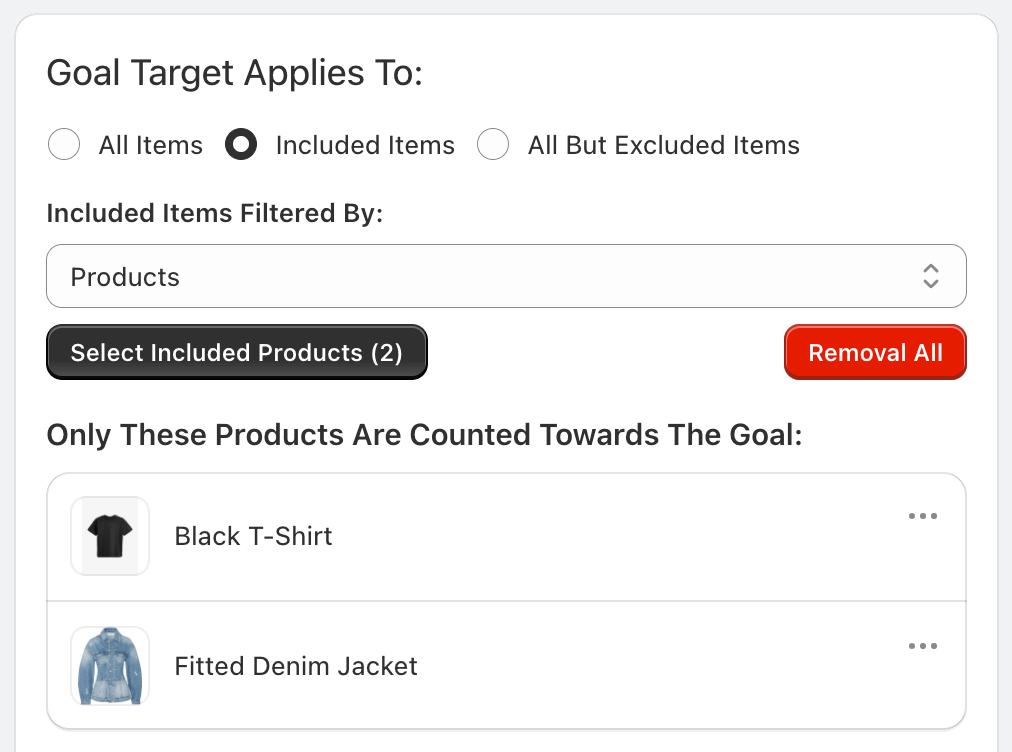
Step 3: Define Eligible Products
Choose which products will count toward the goal. By default, All Products are included, but you can customize this by:
- Including specific variants, products, or collections.
- Excluding certain variants, products, or collections.
This flexibility allows you to tailor the goal to align with your shop’s promotions and strategies.
Step 4: Define the Gift(s) and Delivery Method
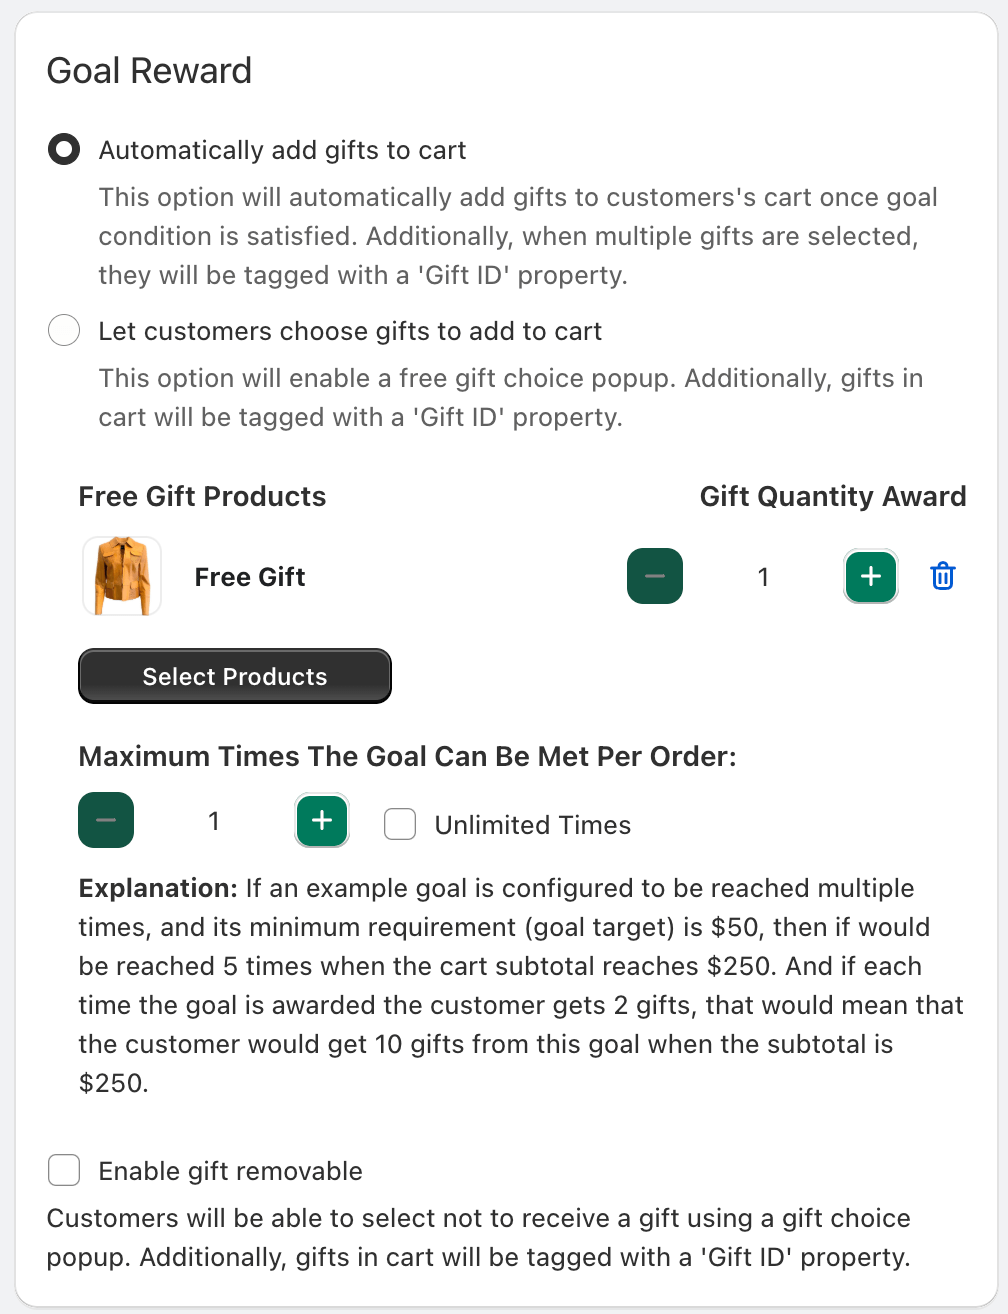
Next, specify what the customer will receive once they reach the goal. You can select one or more of the gift products you created earlier.
You also have the option to:
- Automatically add the gifts to the cart.
- Allow the customer to choose from a list of available gifts and variants.
Additionally, you can configure:
- Quantity: How many gifts will be awarded each time the goal is met.
- Goal Repetition: How many times the goal can be reached within a single order.
These settings give you full control over how the gifts are awarded and allow for a more personalized shopping experience for your customers.
Step 5: Configure Additional Settings
There are several additional settings you can configure, such as geo-targeting, scheduling, and whether the gifts are removable from the cart. These options give you even more control over how the goal operates.
For a detailed guide on how to create and customize a gift goal, follow this link to our complete goal setup tutorial.
Once you’ve configured all the settings, click the Save button at the top of the page to finalize and save your goal.
Step 4: Install a Progress Bar Widget
In the sidebar, click Progress Bar Widgets, then click Configure in the first section of the configuration page.
To help familiarize yourself with the widget installation process, you can review the built-in widget installation tutorial. While you can use App Blocks to install the widget, keep in mind that the app’s built-in installation method typically offers better placement due to the limitations of where App Blocks can be positioned.
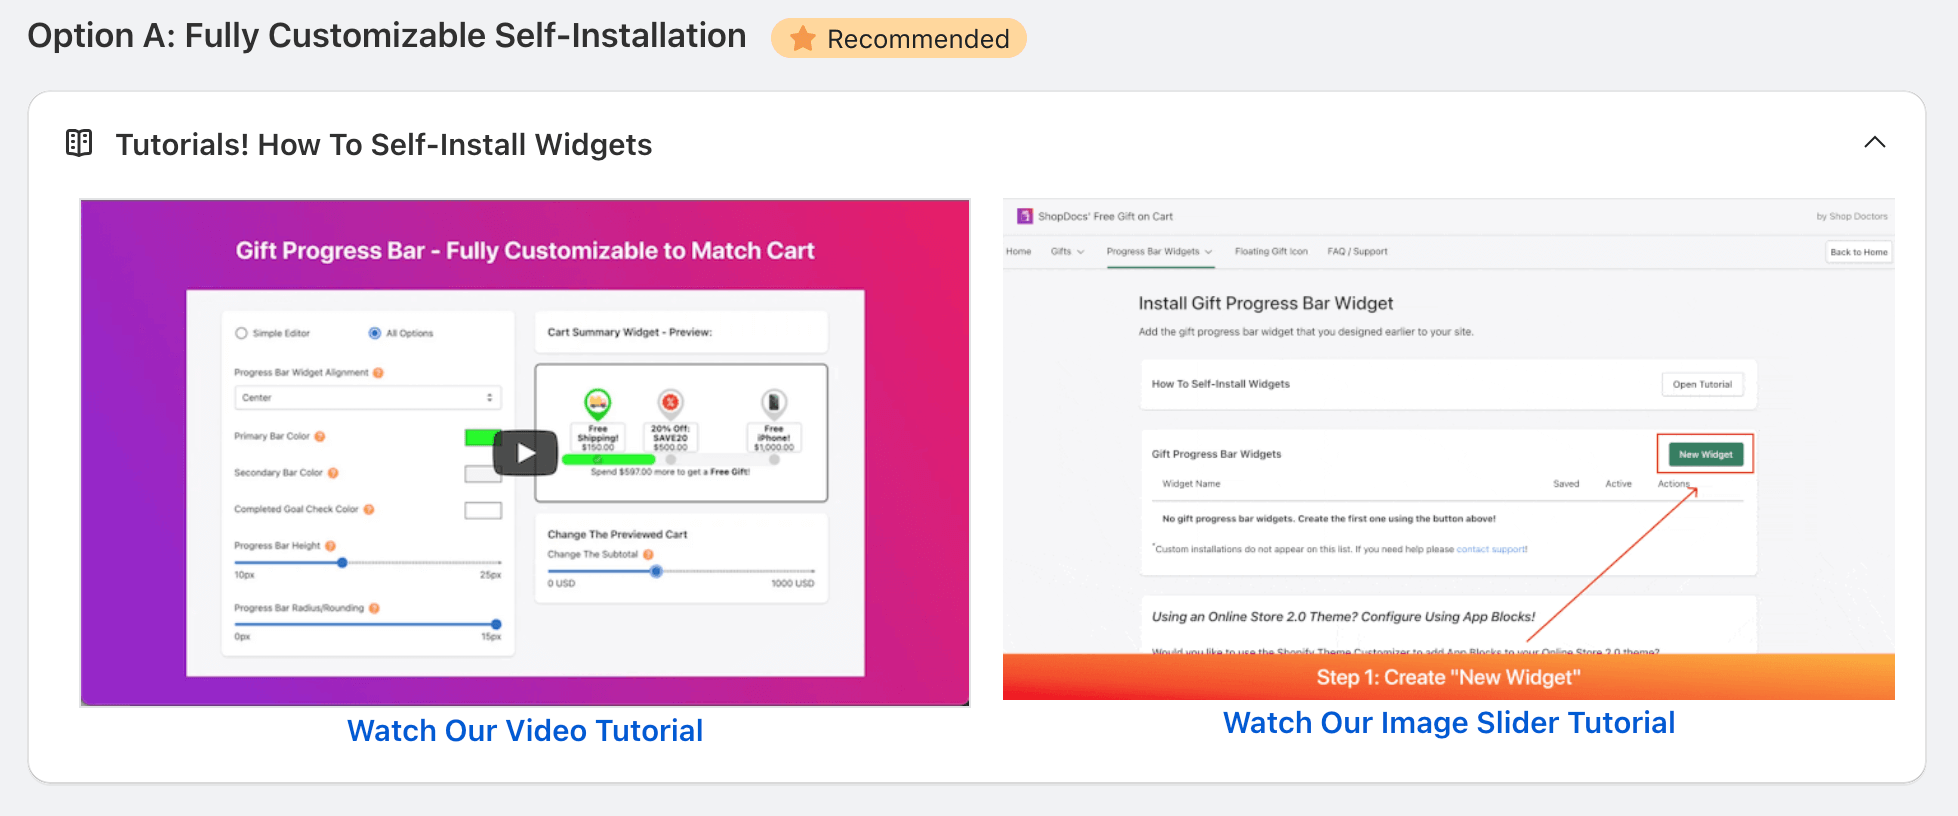
To get started, click the Create Widget button. This will open your shop’s home page with the app’s installer activated.
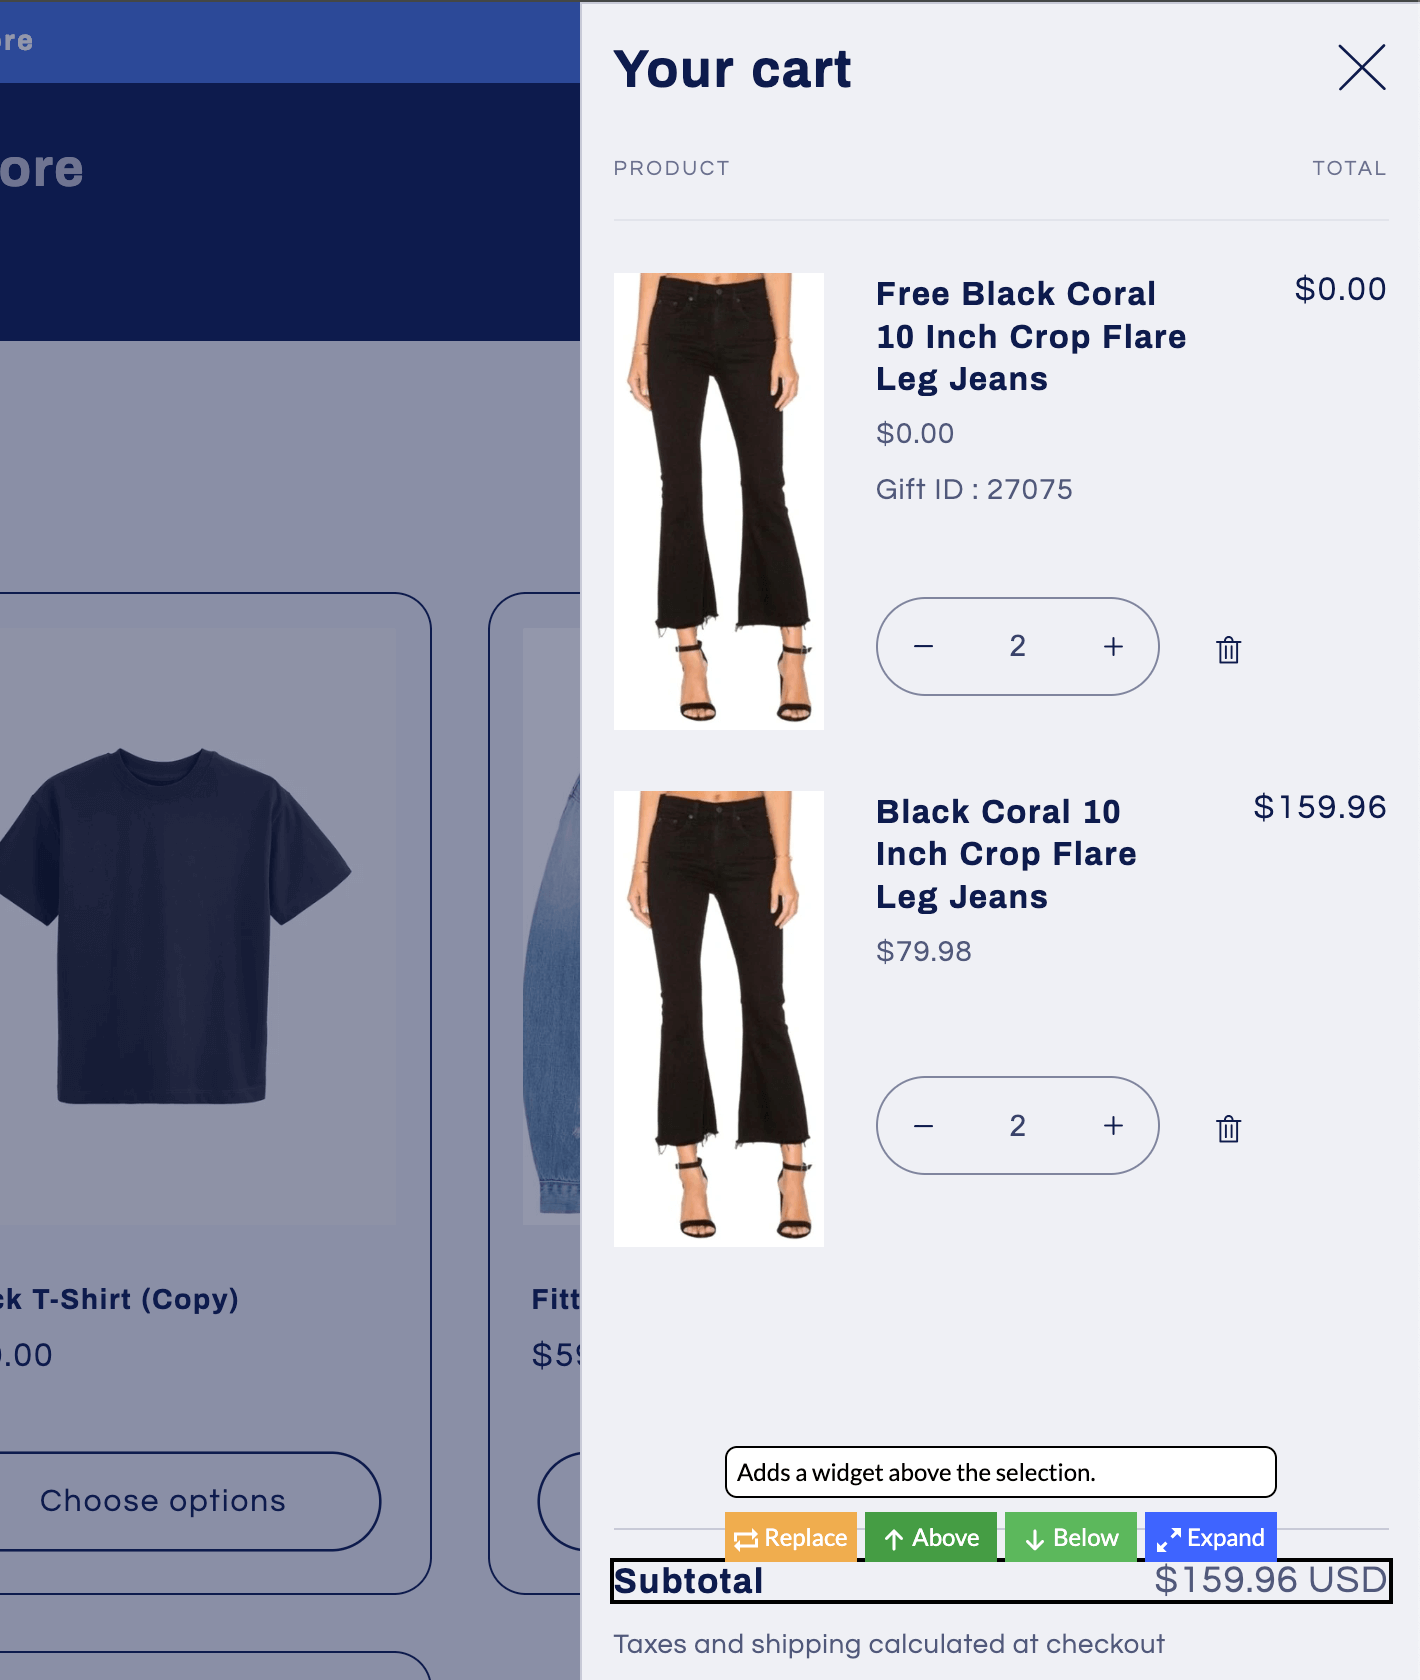
Now, hover over the area of the page where you want the widget to be installed. You can choose one of the following options:
- Above
- Below
- Replace
Click your preferred option to install the widget in the desired location.
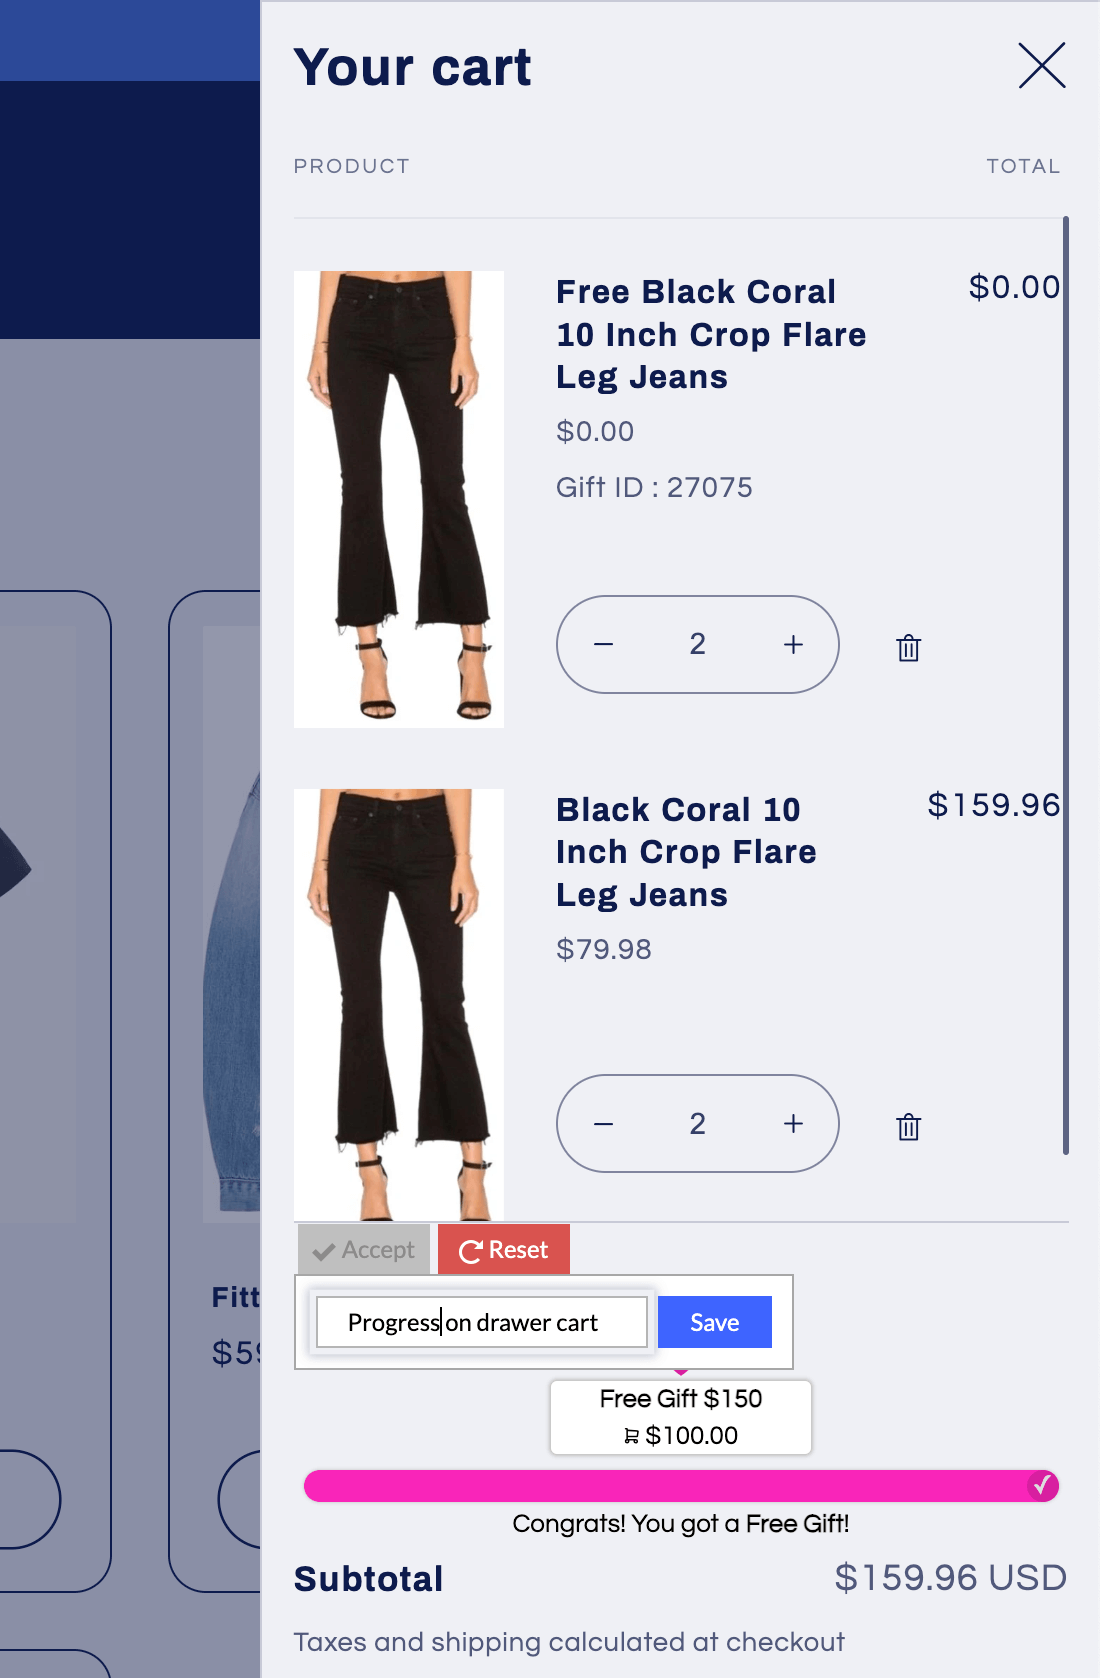
If everything looks good, click Accept, then give your widget a name and click Save to finalize the installation.
Step 5: Configure the Floating Gift Widget
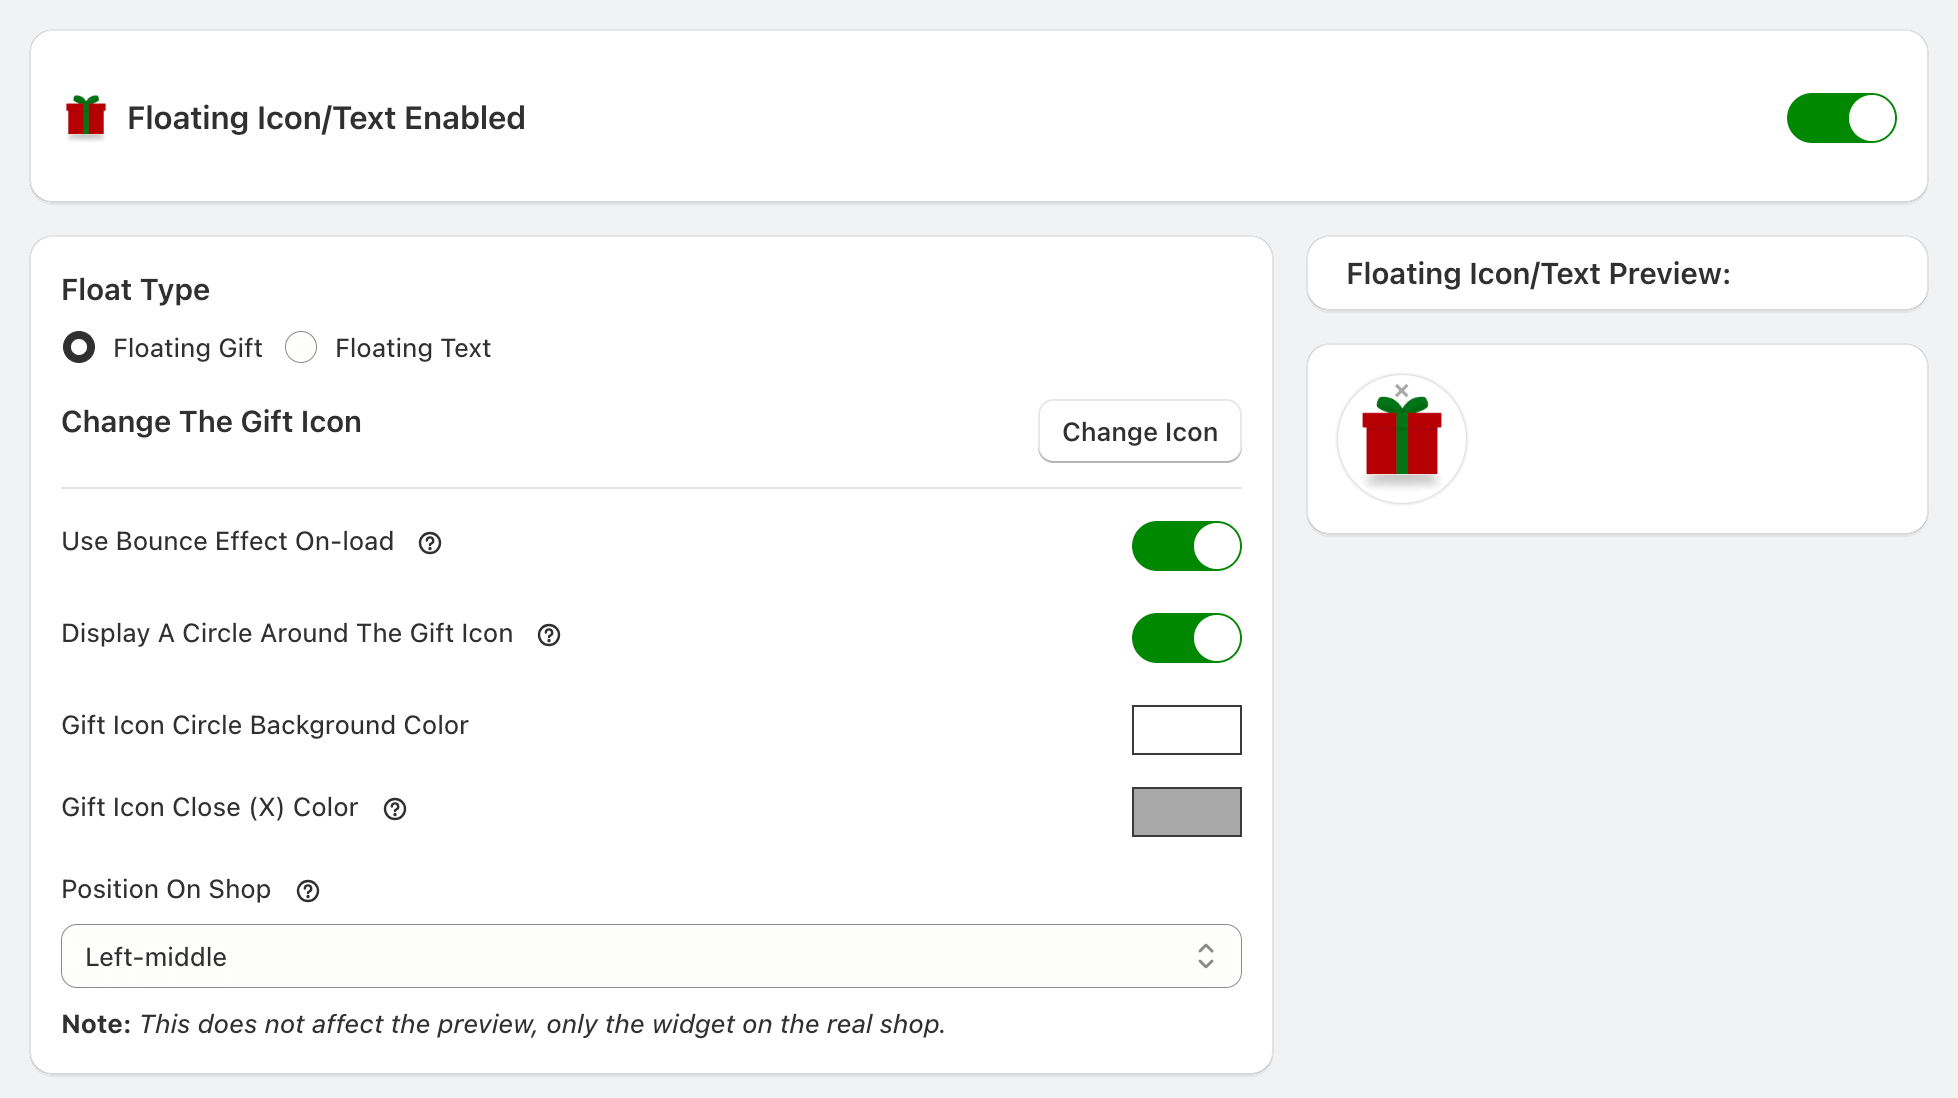
To maximize the app’s potential and ensure all customers are aware of the gifts they can receive by spending more, go to the Popup Widgets page in the sidebar. On this page, click Configure in the Floating Gift Icon section to begin.
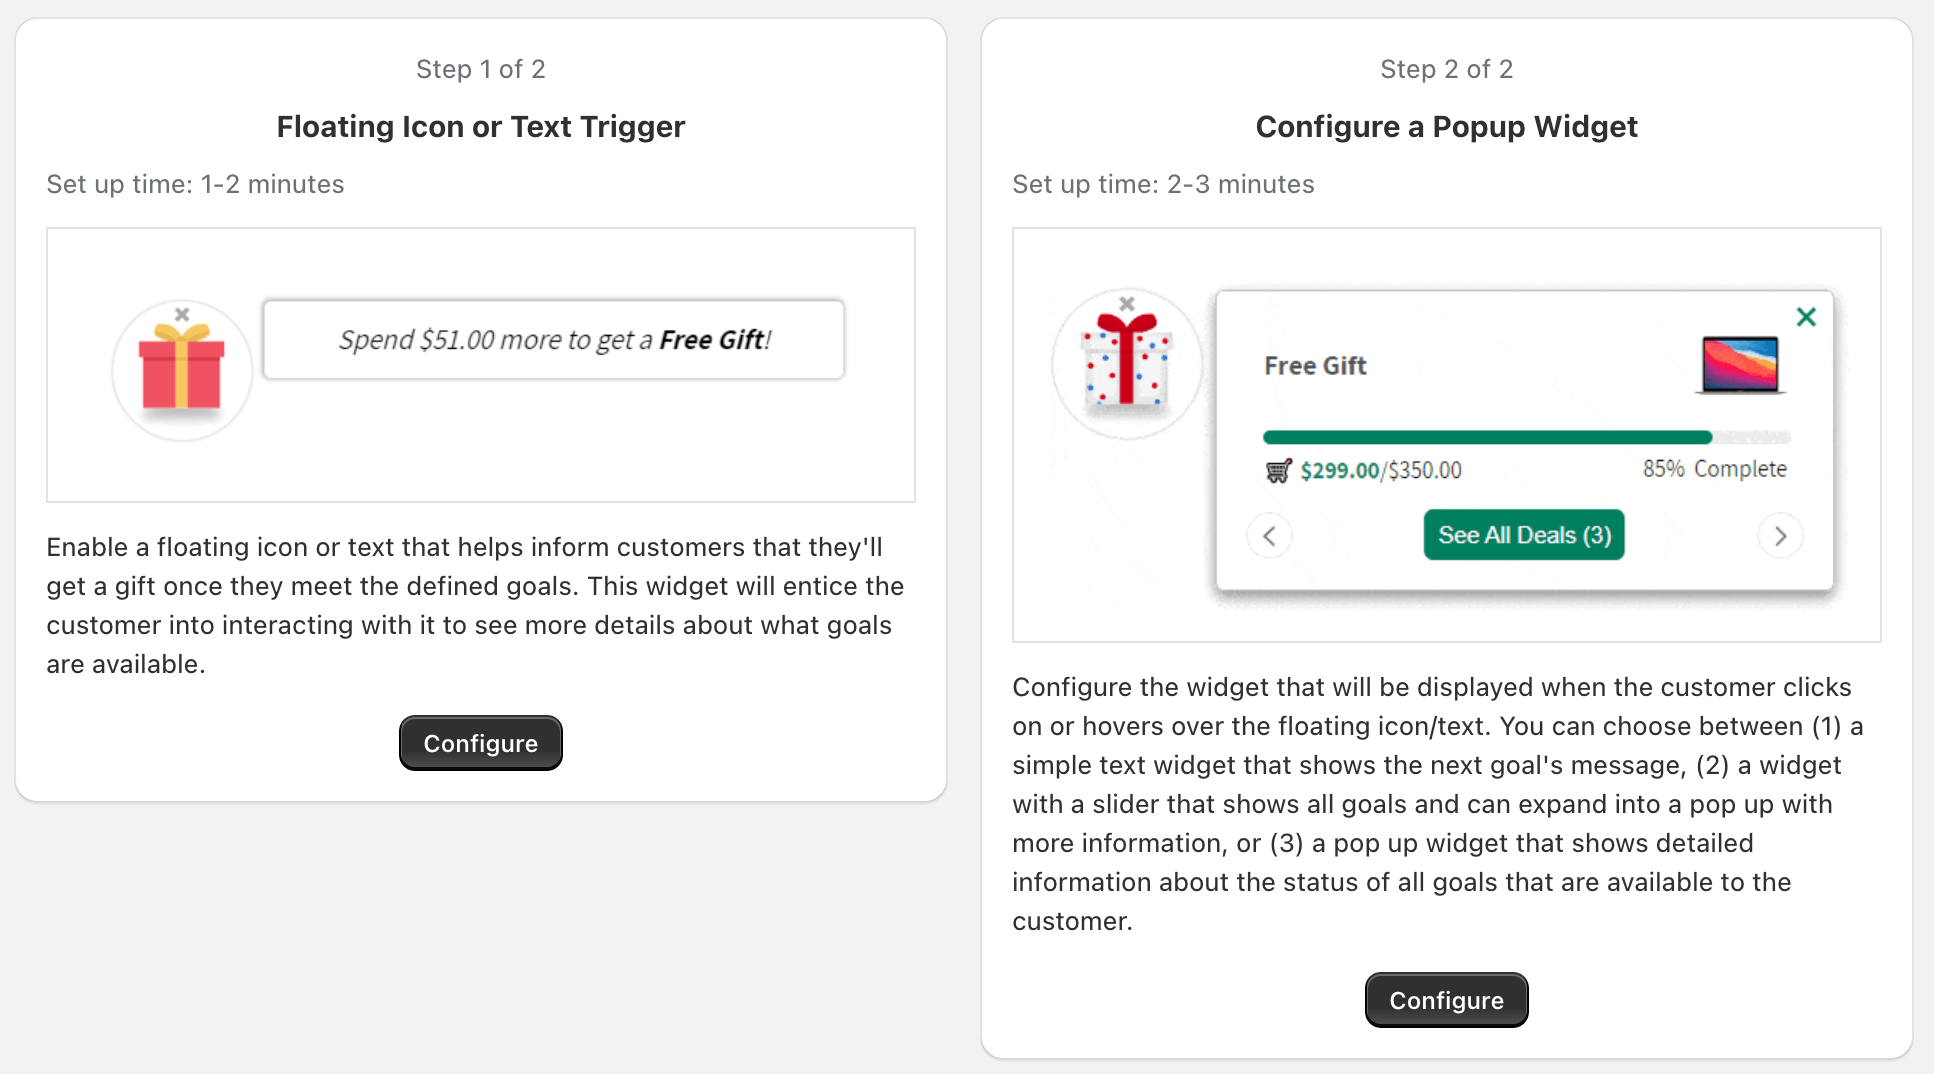
Here, you can enable the floating gift or text feature, which will serve as the trigger for customers to learn more about all eligible promotions.
When using the icon mode, you can choose from the available icons or upload your own custom icon. Additionally, you can select the widget’s location on the page, decide if it should use a “Bounce” effect when first shown, and customize several other options to suit your store’s design and functionality.
Step 6: Configure a Promotional Popup
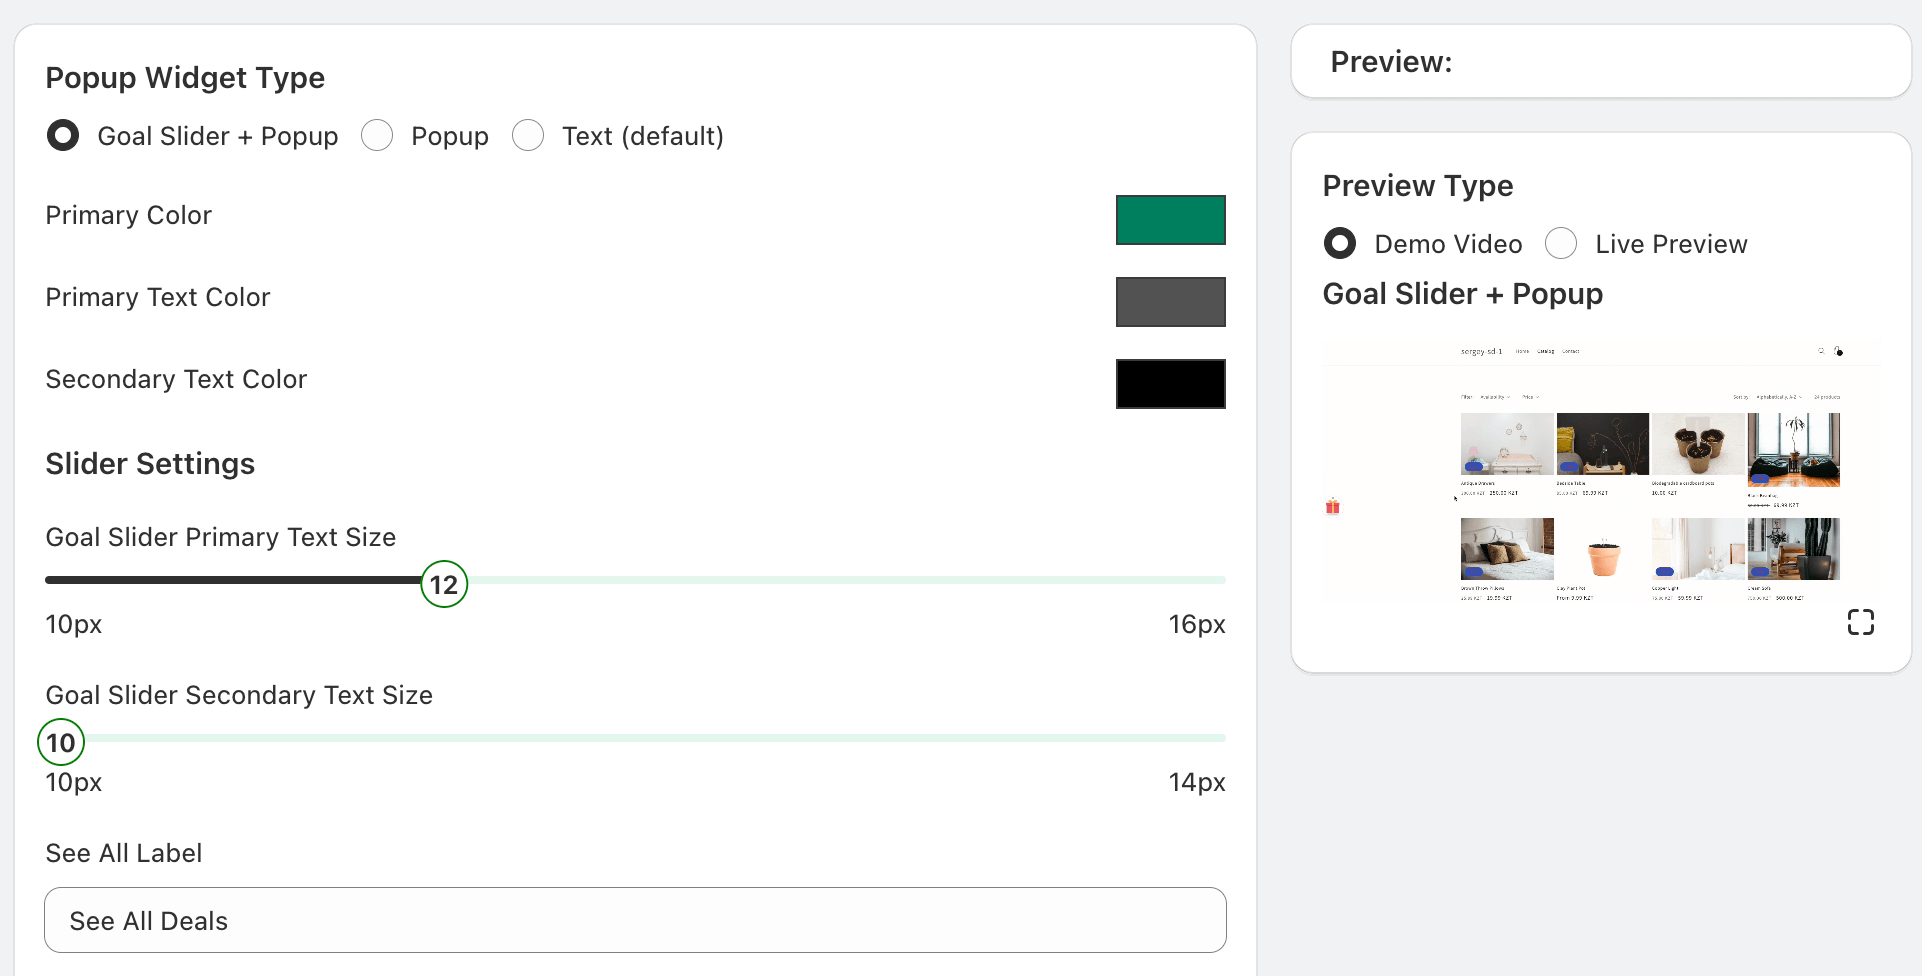
Next, navigate to the Popup Widget tab on this page to configure the widget that will appear when a customer hovers over or clicks the floating widget.
You can choose from the following options for the popup display:
- A simple text-based tooltip
- A detailed popup showing all available promotions
- A minimal slider, which provides a condensed version of the promotion details
Select the option that best fits your store’s design and promotional strategy.
Step 7: Enable the App!
The final step in the initial setup is to activate the app for your customers. This will enable all the features you’ve configured and are ready to use.
Go to the Settings page in the sidebar, then toggle the switch at the top of the page to enable the app.

